Showing posts with label Forgeworld. Show all posts

Thursday, December 13, 2018

Building the Astraeus Super Heavy Tank - Forgeworld


  So.  I did a thing when I went to the GW New Hobbyist Expo in Texas.  I bought a Thunderhawk.  Yeah, needed that like another bolter shell in the head.  But I have always wanted one, so I did it.  To lessen my feelings of guilt and shame, I made myself swear to finish the Astraeus I got for Christmas first.  So herein lies my tale of building the model and how the new ForgeWorld kits are.
Overview
  First off, let me say this.  This kit is a HUGE hunk of Resin and the quality difference between now and just a few years ago is amazing.  Nothing was warped that had any size to it.  A couple of gun barrels, and the main gun barrels needed a little straightening, but it was by no means like it used to be.  If you used to be apprehensive about buying ForgeWorld big ticket items, don’t be anymore.  This kit and the Thunderhawk are beautiful, detailed and needed almost no re-working at all.

  Next, assembly gaps.  Yes, there are gaps in the finished product.  You will have to green-stuff or putty little joins here and there.  This is a fact of life with these resin kits, and I’ll not devolve into the merits of resin v plastic.  These are fun models that need a bit more hobby proficiency than the shake the box kits that GW makes.  But half the joy is in the assembly, so it’s kinda what I paid for at least. 
  The new manuals for assembly are about 3257% better than the old photocopied crap instructions that used to be in these kits.  The new manuals are full color, they show the parts very clearly.  They also take care to overlay colors onto the areas you should glue, and areas where resin will need to be removed to make it look or fit right.  There are also notes and callouts where the assembly can be fiddly, or where something needs to be done to make the final piece have movement or elevate properly.  

  So, the grade for the kit overall is a solid A

Assembly notes.
  I would suggest magnetizing all the weapon options for the tank in a big way.  It’s nice to have options and this is resin, it’s easy to drill the holes and easier to mount the magnets.  If you don’t have the magnets, I would suggest either MagSavvy.com or the MagnetBaron.com.
  I also magnetized the sponsons into the side of the vehicle.  The fit is a little loose overall, and I did not want to glue the sponsons in.  The assembly itself has ‘ridges’ in the holes for the sponsons and the sponsons have splines that will hold them in different elevations.  They are reasonably thick, but I preferred to put a magnet in there to hold it better. 

Turret weight
  The turret is the first thing you build and it needs a few tweaks, at least mine did.  The weight of whole assembly is definitely toward the rear, and the guns are not long enough for the moment of inertia to equalize the weight.  So, they tend to slam down and always point up.
  Since friction is really cool, all I did was take some very thin plasticard (.10) and made 2 sleeves for the gun turret ‘holes’ to tighten it up and hold the guns in any position I put them.  See the picture. 


Glue…
  So, for most of the large body assemblies, I used bamboo skewers as ‘pins’ (the ones I have are nicely rounded and have a 3/32” diameter).  It was easy to drill with my Tamiya drill and then used 5 minute epoxy to glue it all up.  For almost all the littler pieces I just used thick super glue.
  Keep in mind that you’ll need to ‘score’ the mating faces no matter which glue type you use.  I just used an x-acto hobby knife to make lines in the faces.  It gives the glue (or epoxy) an extra surface to bite into as it dries and sets.

All in all, assembly was really easy and straightforward.  I’d have to give it a solid B+.  The manual and the new, clean lines without warpage made it a breeze and done in a couple of evenings.


Painting
  I left off all the repulsor plates, the engines and weapons.  These will be primed separately and be painted then applied.  Hopefully, I’ll get to show you a painted version soon.
So overall, the whole thing gets an A.   It’s a great kit.

Sunday, March 27, 2016

Video Review of Forge World's Modeling Masterclass Horus Heresy Book.

  Did a short video review of the latest forge world masterclass book.  Not as good as the past ones, but still pretty decent...


Enjoy!


Sunday, May 31, 2015

Horus Heresy Book 5 - Tempest - Overview.

Hey folks, just posted a video review of the newest ForgeWorld Horus Heresy Book.  Book 5, Tempest.  Very good if you like Titans, Mechanicum, Ultramarines or Word Bearers.  Check it out!


Wednesday, November 26, 2014

It's Here... Horus Heresy Book 4 - Overview

  It's here, it's really here!  Like Christmas in November, my forgeworld box arrived today!

  Alas, the tale is bittersweet, as the book's slipcase suffered damage in the journey to my doorstep.  I doubt if I will ask FW for a replacement, since it is only the slipcase and not anything on the inside, but I may just email them pictures in hope that they toughen up their packaging.

  For those who do not know, this book covers Horus' actions after the Isstvan events, as he starts his 'crusade' into the imperium towards Holy Terra.  It covers a bunch of Knight houses, the Solar Auxilia of the Imp Guard and more Mechanicum goodness.  There is also a new campaign system, something I always look forward to in hopes it can be adapted to 40k easily.  I'm dying to get into bed and start reading this bad boy!

  I will not be reviewing the book just yet, I always say I will, but I hardly ever get to it.  This is just an overview of what came in.  On with the pictures!!!

 The slipcase with ye olde eye 'o Horus on it.  You can kind of see the damage here on the left side and the two bottom corners.  On the back side is the much better Imperial Aquila!
   Closeup of the worst damage.  At 90 pounds ($140), I kind of expect better packaging, so I may just fire off an e-mail tonight on this.
   But on to the innards... or 30k goodness.  On the left is the double sided, very heavy stock, twin sided poster.  More shots of this later, suffice to say for now that it is beautiful.  In the middle, the meaty bits, or the book itself.  On the right side, the 4 card stock laminated reference sheets.
  As always, a beautiful presentation, gilded pages, metal edges, all very nice.  It looks like they changed the way they glue the picture onto the cover, for there are no raised corners and it seems slightly inset into the cover.  Hopefully no more delamination issues.
   Gilded edges.  That gap is caused by the bookmark, not damage or spine problems.
   The four reference sheets.  One each for special rules and notes, Weapons of the Mechanicum, Weapons of the Space Marines, and weapons of the Solar Auxilia.  A very nice inclusion, I think.

  The two sides of the poster.  It is printed on very heavy card-stock, very durable.  This might be a candidate for a frame, but it would have to be back-folded and mounted very well in order to look good.

  So, there ya go.  The package in a nutshell.  Hopefully I'll get the guts up to review the contents, but I'm always leary of that, since I'm a newb!! :)

Monday, October 27, 2014

War Machines of the Lost and the Damned

Ok, I did a video overview of the bundle as it came in, enjoy.


  A very good offering from the guys at Forge World!  Hopefully I will be able to blog about how cool it is soon, I'm off to read it now...

Thursday, August 14, 2014

Starting the Storm Eagle - ugh - We're in the warp now!

  Howdy!  Well, I have started the Storm Eagle.  I have to admit I was very nervous about starting this one.  First, because it is a pricey model and second, because it was pretty warped to start with.  But after a while of hot water, and an aluminum plate, I have them relatively straight.  At least the sides.

  I plan on getting the sides and floor done, as well as the bulkhead and the door so that I can prime and paint the inside areas.  Even though you can only see it from the front assault ramp and the side doors, I just feel like I have to do it.  It would be weird to build such a nicely detailed model and not have the interior done.

  So, for the warpage.  I had to boil up some water then let it cool for a short time.  Then the whole side went in for a few moments, not even a minute.  I didn't want it to turn to mush!  Once they were out of the water, they were soft, I must say.  I had to get them down on to the aluminum plate quickly.  Mostly because the pieces were hot...

  I could not put them square on the aluminum sheet, because the pieces are not flat, they have a lot of raised details.  I had to pre-plan a method to get most of the surface area onto a flat plane and then know that I might need to use a blow dryer or even another hot water bath to adjust the rest of the piece.  They actually came out pretty well, considering how they started...   Here is the blow by blow for the progress thus far.
The original warped sides.  Warped across 2 dimensions too, so it would be harder to straighten...
The floor of the craft.  Massively warped, but very easy to fix with hot water and a few moments on the aluminum plate.

Here they are clamped to the aluminum plate.  You see how I had to fit them on in a way that didn't warp them around the raised details that they have on the inside.

Clamping on the engine covers and landing gear bays.  They were epoxied on with 5-minute epoxy for strength.  You can also see the engines are built, but I'm not going to attach them yet.  They will get primed and painted first...


  So, there it is, started.  A lot of work to do going forward!  Getting a lot of inspiration from TemplarsCrusade01 and his Thunderhawk build...  Thanks mate!!

Thursday, May 29, 2014

WH40K 7th thoughts and Achilles LR WIP

  Well, 7th is here and the posturing has begun.  There is much love, much hate and lots of opinions.  I, for one, will not venture forth much for opinions, because it is still too new, but I have to say  like what I see so far.

  The Tourny crowd is much disappointed, and I am too, for them.  There is alot that will have to be modified to make the game competition friendly, but I think the tourny crowd actually likes that, even as they outwardly bemoan the holes and issues with the rules.  This gives them a chance to dig in their heels and get dirty, making the rules work better.  I'm sure they'll figure it out, too.  They're a pretty smart lot.

  For me, I love the rules, and I love the FAQs that came out.  Although my Necron's lost the douche canoe (Ind Char on a CCB) it is still a powerful piece with a standard Necron Lord aboard.  The Grey Wolves got a serious smackdown, and I can only hope a codex issues forth soon for them so they get their identity back.  I love the destruction of JoWW, but still, it leaves the wolves alot like any other chapter of marines, albeit adding wolves and fangs.  But still, I love the clarifications, the straightforward style of the rules and the reduction of ambiguity that has taken place.  The psychic phase is replete with fun, I think, although the boys from Frontline gaming certainly showed how it can get weird... I LOVE the mission cards, and yes, I saw the batrep from FLG on that too.  That was so one sided it almost seemed to be destined to show the cards at their very worst.  But, I have also seen numbers of reports of the cards being just great fun, and not that one sided.  I'm looking forward to using them.  My munitorium edition of the rules came in last night, but I had a 16 hour day at work and will do the unboxing tonight!

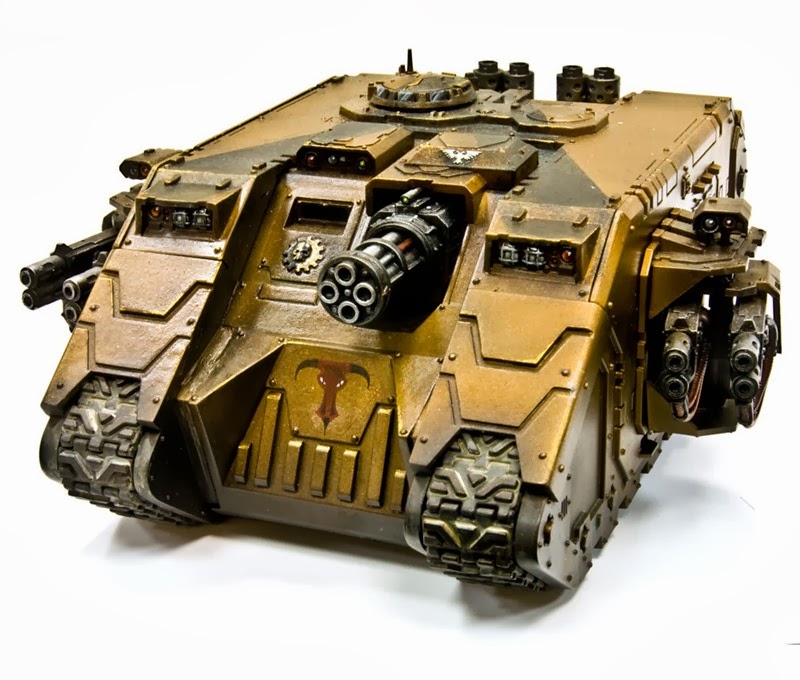
  But now, the Achilles!  I got alot more work done, although it doesn't look like it.  I added some more iconography and ended up making molds to cast some pieces for my chapter.  The mold making process chewed up alot of time, because I had to do all the mold making, clean up the hobby room, organize the shelves and so on.  Like any other project, what seemed simple turned into a memorial day weekend consumer. 

  Here is where I am so far, emperor willing, I'll get it primed tonight!

 I cast a smoke discharger from an older kit, I hate the new ones.  This one nestles nicely on the right fender.  It came out well, too.  Once drilled out, it looks very good.
 Yep, newbie model maker mistake #1...  I painted the tracks, then glued them on before I primed the model.  So, my punishment for stupidity is I got to mask them...
More templar icons,  The winged templar icon I made myself from some old Blood angel and templar bits.  My chapter, the Templars Sanguine, fit quite nicely with the logo.  Ready to prime now...  yay!

  See ya soon, be well!

Thursday, May 15, 2014

Forge World HH3, GW Binders and Frontline Gaming Space Mat

  Wow, last week was a big order delivery week.  Seemed like every day I had a new box arriving with stuff in it.  Very fun.  Too bad I was swamped with other things to do!  So without further ado, here are the toys as received;

   The Horus heresy Series book 3 collector's edition.  As if the others weren't good enough, this one takes the cake!  Limited to 1500 copies (mine was 337) and worth every penny, as you might imagine from FW.  The bindings and all the accoutrements are the same high quality as all the others.  This plus the fact that the set makes a nice display for all three books makes it a HUGE plus.  Well done, FW.
  Book 3 is every bit as good as the first two, if not better.  Adding the Raven Guard (yay) sold me, as if I wouldn't have gotten it anyhow.  The Mechanicum information is a huge plus.  The campaign system is totally fresh and new, and from my cursory read through, looks like a lot of fun.  It's a smaller scale than the others, as the battles in this book are mostly smaller scale as well.  There are rules and procedures for heroes and wounds, etc.  Play on a 4'x4' board too.  I have to read more into this and really dig into it, but it looks awesome. 

   The other two books are the compilations of the army lists and gear from the entire trilogy.  A very nice touch and very handy to have compiled into one book.  Love them!!
   Now, does that not look cool?
   Yeah, I did it.  Yes, I think Horus was a wussy (see Horus the Wussy Warmaster) but I did like the guy before he wimped out and went all chaosy.  The miniature is amazing, and I am really looking forward to this one!!
  He has a large base, but he is removable for use on the table as well.  The cast looks solid and clean.

  I also got the Space Battle mat from Frontline gaming, and you can see it underneath all the above pics.  It is the same super high quality as the alpine mat I already have.  These things are really the shiznit.  You gotta get ya some!!
   I got my shipment of GWs new White Dwarf binders.  These are very cool and if you have ever spent time in Europe, you'll be familiar with them.  You don't see them so much over here stateside though.  It is just a binder with 13 very tight strings running along the spine.
   Thar be the strings, see em?  They run lengthwise, along the spine.  There is also some nice art on the inside covers.  I find the easiest way to insert the issues is to scrunch all the strings to the far right side of the binder, then slide one over and insert the magazine.  When your done, you have this...
  It puts 13 magazines into a binder (one quatrter of the year) and at your finger tips.  Keeps them from getting torn up, and some day, when you e-bay them, you'll be able to get more for them :)

  Take care, gentle-readers.  Enjoy your day!

Thursday, May 1, 2014

LR Achilles WIP #2 - Details

  Back home, and got the airplane crud.  Fever and chills, you know, the stuff you get from being on an airplane for 8 hours...  Oh well.  I felt ok for a while and decided to do some more work on the Land Raider Achilles.  And here it is...

 The side door had to be 'wallered' out (enlarged) in order to be able to get the 9 volt battery in and out.  I could have used the cool small battery that PoweredPlay gaming sells (I got two with the kickstarter package) but I wanted to save those for really tight spaces.  I also magnetized the door so it would pop in and out easily.
 Well, every big gun needs ammo, and the more ammo, the better, right?  So I tossed on a bit more ammo.  Added some brass Black Templar bits too.  The Ammo crate didn't look right though.  It would fall off if the thing accelerated...
   So, I put the twist on some copper wire and made a couple of swages.  I used  bent up paper clip for the grab irons. 
   Then I got a bit crazy with the grab irons and I figured this beast would need a tow cable too.  So on went a few more grabs and a tow rope.  Had a little fun with it.
 Every tank needs a number, Thank you MrJustin at SecretWeaponMiniatures for the roman numerals!
  Last, but not least, Squadron green putty to fill all the gaps.  I still have to sand it all smooth and make it look good, but she is basically ready to prime.  

Sunday, April 13, 2014

Land Raider Achilles - WIP #1 - Lighting

  Well begun is half done, right?  I started the Land Raider Achilles from Forgeworld tonight.  Got quite a bit done, a lot of the build is complete.  Went together very well, haven't had to re-work any of the resin pieces at all.  I decided to light up the headlights with an Alpha set from PoweredPlay Gaming, and that went well also. 

  What follows is the pictorial history of the evening.


 Pretty standard land raider build to start off.  In the instructions, they say you need to glue in the engine piece to the interior, trouble is, that does not fit.  The slope of the rear glacis prevents the engine piece from sliding in.  Even in their images for the build, it shows it removed from most of the pictures.  I left it off.  No sense fiddling with something that will never be seen by anyone.
   5 Minute epoxy was used to join the plastic and resin pieces.  I like the epoxy better than super glue, it holds more solidly.
   Testing the PoweredPlay set to make sure it works.
 The initial install of the lights.  Fairly simple process to drill out the headlights to 1/8" to fit in the LEDs.  I used orange and white, orange for the fog lamps...
   Holding down the wires with hot glue so they don't muck about while I'm trying to glue the top down.  Had to drill out a small channel for the wires as well.  The tin foil was just used to prevent the LEDs from bleeding light everywhere since they are set back.  I don't like the look of the LEDs sticking way out of the headlight frames.
   Mounted the board with hot glue to the rear glacis and the screwed the switch in to the bottom after cutting a hole for the switch.  The battery is actually outside the hatch in this shot.
  And there it is, all lit up like a death dealing christmas tree.  The tracks are off getting primed in painted to metallic glory.  A little green stuff work done to make a couple of gaps go away.

  That's all for now.  More to come...

Saturday, February 8, 2014

The latest Forgeworld order arrives

  Yipee!  The new Forgeworld order came in and boy am I jazzed.  This order was highlighted by The Land Raider Achilles.  Wowza...  Just imagine, Land Raider with Thunderfire cannon awesomesauce on top.  As long as there are no enemy AT equipment out there, this will RULE!!!  (So, I will never play against the hellturkey!!)  But really, I think if used right, this will be a nice, and very fluffy addition to my Templars Sanguine Army.  Right next to the Reaver Titan, raining fiery, hot death on all enemies of the Imperium!!!!


  It makes no sense to have a cool piece of armor like that and no rules, so I had to get...  Imperial Armour Volume Two – Second Edition: War Machines of the Adeptus Astartes.  This book is so very cool, it hurts.  The art is fantastic, and a lot of it is never before seen stuff.  Some of the pictures are, of course, photoshop mash-ups that put the gear into war scenes, but they are so well executed that you really feel like you are reading a historical piece on a real vehicle.  Virtually every vehicle also has a full page sheet of "Adeptus Mechaniucus Vehicle Specifications", all fluff here but so well executed.  You get, of course, all the rules and where they fit into the scheme of 40k, be it a tank, heavy, super heavy, lord of war, etc.  The book also has Sisters of Battle equipment and Grey Knigh/Inquisition chapters as well.  Dreadnoughts, Air vehicles, you name it' it's here.  The fluff is beautifully done and the rules are all incorporated from the GW/FW sources.  Yes, it is a "compendium" of other sources, but it does keep you from having to lug around 6 books, in favor of this one.  This is a MUST have if you play/plan to play with any FW stuff.


  And because I am futzing around with the Templar Sanguine fluff again, I had to get one of these and his little buddies...  It is the old Air Defense Command Platform along with it's buddy, the Air Defense Missile Launcher forming everyone's favorite Hyperios Air Defense System.  Now who just doesn't love that?


These were picked up for a scenario I am thinking about in my head for an all out defense against an all out attack, Apocalypse style.


 More, after the jump...